Learn How to Switch HTTP to HTTPS with better SEO techniques
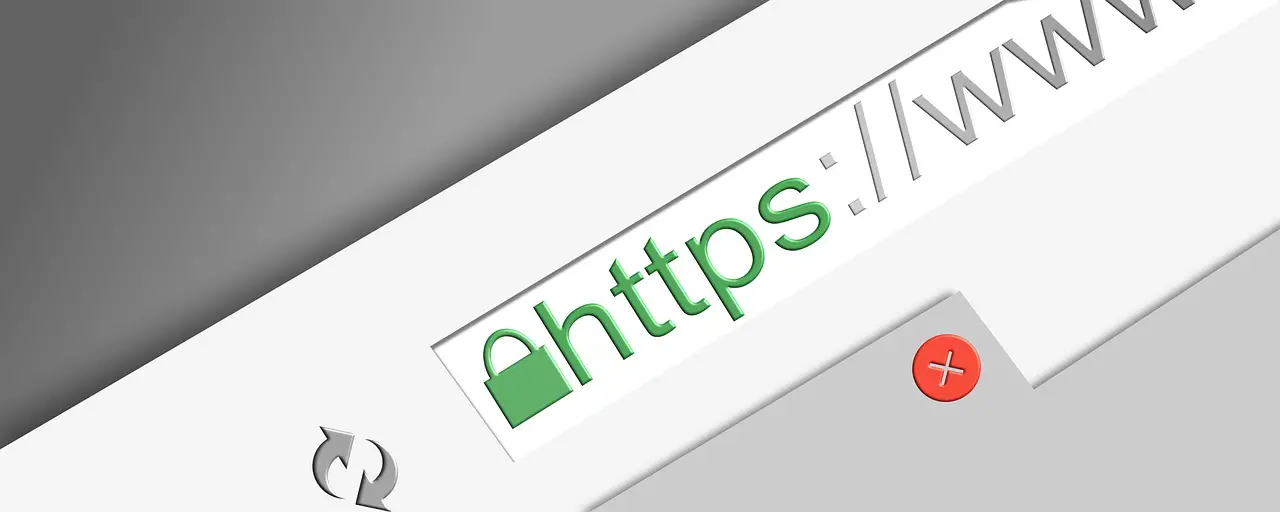
When you purchase a domain and host a website, the first common thing appears in the browser is "Not Secure". Why because? The website or webpage you have visited does not provide any secure connection. So the browser connects a website with either HTTP or HTTPS; if a website connected with http connection gives you a warning sign that you are visited site is not secure.
In the past, http websites are very commonly used to serve the needs of users. Since security and privacy are the keys to protect personal data as well as their financial information stealing from reputation sites. So this keeps them safe from hackers who misuse your personal data and financial information from the respective websites.
Many webmasters, individuals, developers, and enterprises website are migrating to https to secure their websites and build a solid trust between visitors and hosted sites. It also encrypts sensitive information that is transmitted between web servers and browsers.
Nowadays HTTPS is a must for website security. It was established following a client's need for encrypted communication, so the common buzzwords for the https website are integrity, confidentiality, and authentication. Setting up HTTPS is easy and always remember to host with a dedicated IP address. HTTPS is a far more secure system along with many benefits including product sales, and trust.
Learn How to Switch HTTP to HTTPS with better SEO techniques
What is HTTP?
Hypertext Transfer Protocol popularly called HTTP is an underlying protocol, which is used to transfer data over the World Wide Web. This internet protocol basically defines services and commands which are used to transmit webpage data. HTTP would use the server-client model and states how messages would be formatted and transmitted and the actions browsers and servers take in response to different commands. The HTTP server would be a web host that runs on web server software like IIS or even Apache. The client could be a laptop or even a mobile.
What is HTTPS?
An extension of the Hypertext Transfer Protocol is the Hypertext Transfer Protocol Secure or the HTTPS. It is widely used over the net for secure communications over a network. Transport layer security encrypts the communication protocol, so HTTPS takes the HTTP protocol and layers an SSL encryption over it. Speaking between servers and clients remains the same except the SSL connection would encrypt and decrypt requests and responses.
Differences between HTTPS and HTTP:
The main difference is HTTPS is secured while HTTP is not.
HTTPS sends data over port 443, while HTTP sends over port 80.
HTTPS would operate at the transport layer while HTTP operates at the application layer.
HTTP doesn’t require an SSL certificate while HTTPS does. This certificate must be valid and signed by a CA (Certificate Authority).
Sending sensitive data such as password or credit card information to HTTP website is not protected while HTTPS do all kinds of encryption to protect your sensitive data.
Why you should switch to HTTPS?
HTTPS uses the Secure Sockets Layer (SSL) certificate to encrypt data between the receiver and you. Information is encrypted so that it’s viewed only between the recipient and the sender.
Since http website is not secure, so web security is vital for the well being of your site. Users can safely access your website through HTTPS, which adds a layer of protection. Nowadays search engines recommend to use https by obtaining valid Certificate Authority; this keeps sensitive user information safe.
To protect customer’s sensitive data from man-in-the-middle attacks, you need a high level of security. So before setting up a certificate from a hosting provider check whether the security is 2048 bit key rather than a 1024-bit key.
When switching to https, here are the 2 things you need to follow;
- Get a valid Certificate with a high level of security from the trusted SSL service provider with proper technical support.
- Next, decide the type of SSL certificate you need. Either it can be a Single certificate, Multi-domain certificate or Wildcard certificate.
HTTPS migration has many advantages and layers of data protection, such as
Security: Website owners have to take responsibility for their security and Google rewards those who do. Simply speaking HTTPS protects data confidentiality and the integrity of your website.
Builds trust and credibility: Users enjoy a safe and secure experience in an age where internet security is under all kinds of threats. In the future, website security is of utmost priority.
Authentication of the website: For e-commerce sites that have lots of sensitive data and payment transactions, data security is critical. Users love secure websites with HTTPS for a safe browsing experience and peace of mind.
Better referral traffic and backlinks: Google Analytics referrals are usually lost when non-secure websites have inbound links from a secure source. HTTPS prevents tampering by third-parties, encrypting communications, and protects browsing history. So, upgrade to HTTPS to enjoy good referral traffic and backlinks.
Improve SEO performance and rankings: Getting an SSL certificate is the easiest thing to do to improve site rankings. SSL correlates with higher rankings on the first page of Google. HTTPS is faster than HTTP which means faster loading and better rankings. Google uses HTTPS as a ranking signal and making the switch has advantages over HTTP links.
Types of HTTPS certificates:
i. Domain validated SSL certificates:
These are basically SSL certificates that are issued after applicants prove control over a domain. No other validation is required. To get a domain validated SSL certificate, just prove that you own the domain. This can be done by responding to a phone call or email using information available through the WHOIS record in the domain. This is done to verify that you did register for the certificate.
There’s no need for the Company to be validated as the name of the organization is not entered in the domain validated SSL certificate. Simply respond in the affirmative to the mail stating requirements are met and the certificate is issued. This is a quick and economical way to secure your website.
Domain validated SSL certificate is the lowest level of authentication. Anyone listed as the domain admin contact in the WHOIS record gets the authentication mail. Fraudsters easily get SSL certificates by misspelling legitimate domain names. The regular visitor is fooled into this site as he may not check the misspelled address.
The https only works for a single secure domain but not for sub-domains. It is quick and effortless to install, which usually takes less than 10 minutes. Once activated, you can see browser padlock with a secure symbol for all the webpages.
For example,
Before
After
ii. Organization validated SSL certificates:
Organization validated SSL certificates offer minimum protection as required by e-commerce sites. The e-commerce sites generally process personal data of users. Organization validated SSL certificates assure visitors that the website is genuine and you are who you claim to be.
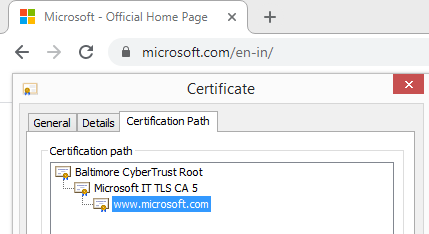
The OV SSL Certificate displays the HTTPS prefix and a small padlock in the browser bar of a visitor. This shows the site to be encrypted. The OV certificate requires higher validation than the domain validated SSL certificate but offers higher protection and trust. The Company name is shown on the certificate which means the website is reputable. OV SSL Certificates are used by governments and corporations to enjoy the extra security and user confidence. These certificates are used for document signing, code signing, MIME email certificates, and customer authentication.
When Comparing Domain Validation SSL with Organization Validation SSL, it is slightly different; this type of SSL provides instant corporate identity validation and very strong SSL security for business and individuals websites.
The credibility will be much higher than domain validated SSL, shows secured browser padlock, and also organization assures visitors that website is more protected, legitimate, and serious about the security.
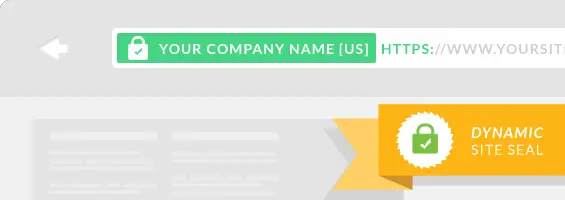
Organization Validation SSL doesn’t come for free; it should be purchased from industry-leading CA providers with robust world-class PKI infrastructure. Displaying a secured site seal will help visitors convert them into valuable paying customers.
iii. Extended Validation SSL Certificate:
The extended validation SSL certificate gives users confidence and is the highest class of SSL available. The EV certificate states you are the legal entity who applied for the certificate and the website is under your control. This is the strongest encryption level and the organization enjoys its own verified identity. EV SSL certificates activate both the green address bar and the padlock across major browsers.
With an extended validation SSL certificate, you go through an identity verification process that shows you as the website owner. You must prove exclusive rights over the domain, show the site's legal and physical existence, and also prove the authorized issuance of the certificate by the entity.
- EV SSL certificates have a green bar in the browser as a visual signal. This shows credibility even to a novice user.
- The certificate has the organization name clearly displayed in the browser bar along with additional information.
- These certificates are costlier than OV certificates but have added benefits.
- EV SSL certificates are used by big organizations across the Globe.
- EV SSL website is 100% safe for all online transactions compared to standard SSL where only HTTPS is displayed.
How to install an SSL Certificate on the Website?
Get a dedicated IP address:
- To install an SSL certificate, you need to have a dedicated IP address. This ensures that traffic goes only to your website.
Purchase a certificate:
- Get proof to show ownership of the website. (This is just like an ID card). This is done by creating an SSL certificate. The certificate is simply a paragraph of numbers and letters known only to your site. (This is just a long password).
- Now, if a user visits the website through HTTPS, the password is checked at once. If it matches it proves the authenticity of the website and everything flowing to and from the website is encrypted.
Activate the certificate:
- To activate the certificate, you must generate a CSR. This can be done easily within a website hosting control panels like cPanel, Plesk, or any other trusted hosting control panels. Just go to the SSL admin area and choose, “Generate SSL certificate and signing request”. A screen appears and you must fill in the fields as required.
The domain name would be “Host to make cert for” and you may leave the contact email blank. After filling, a screen appears simply copy the first text block. This CSR is necessary for the SSL certificate issuer to establish your identity. You then login to the account and activate it. Paste the CSR and any other fields as needed. You then have to give an email address which proves you own the domain.
After getting the certificate to paste in the web host control panel, your site becomes secure. What if you are using the WHM.CPanel? Simply go to the SSL menu and click “Install an SSL Certificate”. You then paste it in the first box and hit the submit button.
Nowadays most of the hosting control panels provide free “Let’s Encrypt Authority” SSL directly from the hosting control panel. Just follow the guidelines and fill the form, within minutes your site is completely secured.
Update website and use HTTPS:
You have installed SSL and enabled HTTPS protocol. Make sure visitors come to your site only through HTTPS. Simply identify target pages and update all links to HTTPS links. Make sure this is done for all links on all pages which point to secured URLs.
Install free SSL Certificate using Cpanel:
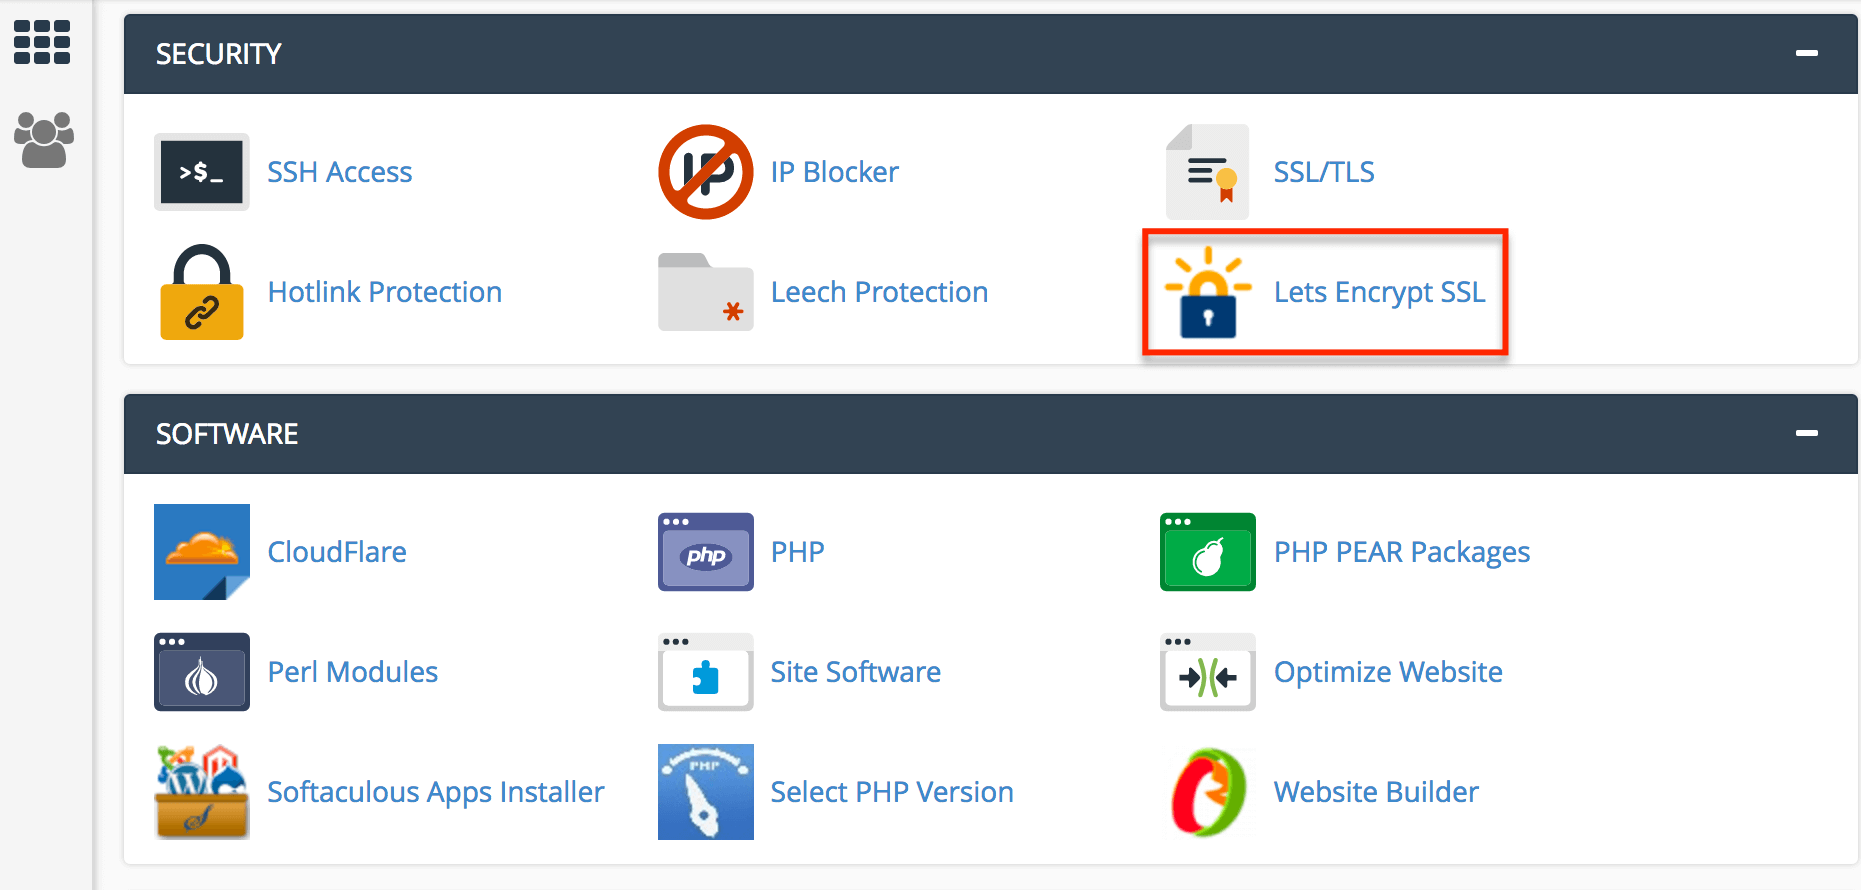
- Login to the cPanel account and locate the SSL Manager in the Security Section.
- You then click Manage SSL Sites under the Install and Manage SSL from the HTTPS menu.
- Copy the certificate code got from the Certificate Authority and make sure to paste it in Certificate: (CRT) field.
- You then click on Autofill by Certificate button which would appear next to the certificate and the system would fetch the private key and domain name. Make sure to enter End/Begin headers and footers for both the key and the certificate.
- Copy and Paste CA Bundle in the box under Certificate Authority Bundle.
- You then click Install Certificate and the certificate gets installed on the server for your website.
Install Free Certificate using Plesk:
Check website URL:
- If your website URL shows ‘HTTP’ the website is not secured by an SSL certificate. If the website shows ‘HTTPS’ it is a secured website. You enjoy secure data transmission across the browser and server.
Get security for the website:
- You then login to Plesk and click on the sidebar domain and websites. You then go to Hosting Settings. You see two options in the security section to enable and make the website secure.
- You then visit Websites and Domains and the Lets Encrypt authority allows the creation of a free SSL certificate for the domain. You then click the Install or Renew button which shows you have read the terms and conditions and agree to them.
- If you want to check if SSL installation is done, simply go to another tab and enter the subscription name. You get to see secured ‘HTTPS’ URL.
Install SSL certificate using a third-party SSL Provider:
- You must first navigate to the page which has the SSL/TLS certificates.
- You then click the Add button to the right of your domain.
- Click ‘import a certificate’ at the top.
- You then click on the ‘Select this option’ button.
- On the flowing page, you get to see 4 empty boxes. These are private key, certificate, certificate signing request, and the intermediate certificate. You must enter the third-party certificate information.
- You then click the button which says proceed with certificate configuration.
- Your new certificate is live in 15 minutes. Check SSL/TLS certificate page and you see certificate ‘imported’.
- You then load your site in the browser using https where you see the padlock icon at the start of the URL. Simply click on the prominent icon and you see the certificate as verified and active.
Switch http to HTTPS by redirecting all URLs
1. HTTPS Redirection in Apache Htaccess:
When you install an SSL certificate, your website is not available through HTTPS connection automatically. You must add HTTPS to the URL, whenever a secure connection is necessary. The best way website visitors enjoy maximum security is an automatic redirection from HTTP to HTTPS.
- You must enable redirect in the virtual host file for your domain.
- The HTTPS redirect is enabled through port 80 (This is a non-secure port), in the virtual host.
- If you want all web traffic to compulsorily go through HTTPS, you would have to insert code in the .htaccess file. You can also redirect traffic only to a specific domain.
************************************
RewriteEngine On
RewriteCond %{HTTP_HOST} ^yourdomain\.com [NC]
RewriteCond %{SERVER_PORT} 80
RewriteRule ^(.*)$ https://www.yourdomain.com/$1 [R,L]
************************************
How to edit the .htaccess file?
There are many ways to edit the .htaccess file;
- You must first edit the file on your laptop and use FTP for the upload.
- The edit mode in the FTP program assists you to edit remotely.
- A text editor and SSH help edit the file.
- The File Manager in cPanel can also be used to edit the file.
2. HTTP to HTTPS redirect in Nginx
Nginx popularly pronounced as Engine-X is a web server based on Linux. It helps manage web traffic and can be easily configured to redirect any unencrypted HTTP web traffic easily through an encrypted HTTPS server.
- First, edit the Nginx configuration file.
- You would have to locate the file in the directory. (/etc/nginx/nginx.conf).
- Open the Nginx configuration file in the text editor giving the requisite command. Sudo nano /etc/nginx/sites-available/server.conf
- You then replace the location with your location (actual location) and the name of the configuration file.
- After the configuration file is open for editing, insert the requisite code. Save the file, exit, and restart Nginx with sudo service nginx restart command.
Redirect Code using Nginx
server {
listen 80 default_server;
server_name my_app.com;
return 301 https://my_app.com$request_uri;
}
3. HTTPS redirection in Cloudflare:
Having your website enabled with HTTPS doesn’t mean that all your visitors are protected. If the visitor just types the website name in the address bar he would reach the HTTP version of your website. You must redirect all website visitors to the HTTPS version.
Using Cloudflare is like clicking a button. You simply must enable the ‘Always use HTTPS’ feature and all website visitors to the HTTP version are automatically redirected to the HTTPS version of your website. You also have the option of redirecting only some subsets of your requests by using ‘Always Use HTTPS’ settings on the URL pattern.
Your website is fully secured with HTTPS-only enabled. You now take this a step further using HTTP Strict Transport Security. Enable this using the crypto app which is right under the Always Use HTTPS toggle. Browsers are told that your website is available for a set time over HTTPS. After the browser sees the HSTS header on your website, it automatically fetches the HTTPS version, without the need of a redirect.
Use Cloudflare's Origin CA to secure the connection between your website and Cloudflare and get a free certificate for origin server. After the set up of origin server with HTTPS, simply change the SSL mode to strict and you enjoy the highest level of security.
Rebuild Robots.txt and XML Sitemap File
You definitely want bots to crawl through your website and index webpages faster. You need two files to help bots find what they need, they are the Robots.txt file and XML sitemap.
A simple text file placed at a site's root directory is the Robots.txt. This file tells bots what must be crawled and what must not, on your website. Certain commands allow some bots to crawl, while some are restricted. If you found any URL’s with http, check and re-update with https.
Search Engine bots lookout for Robots.txt on your website. You need Robots.txt even if you want bots to crawl your entire website and also have important information on sitemaps.
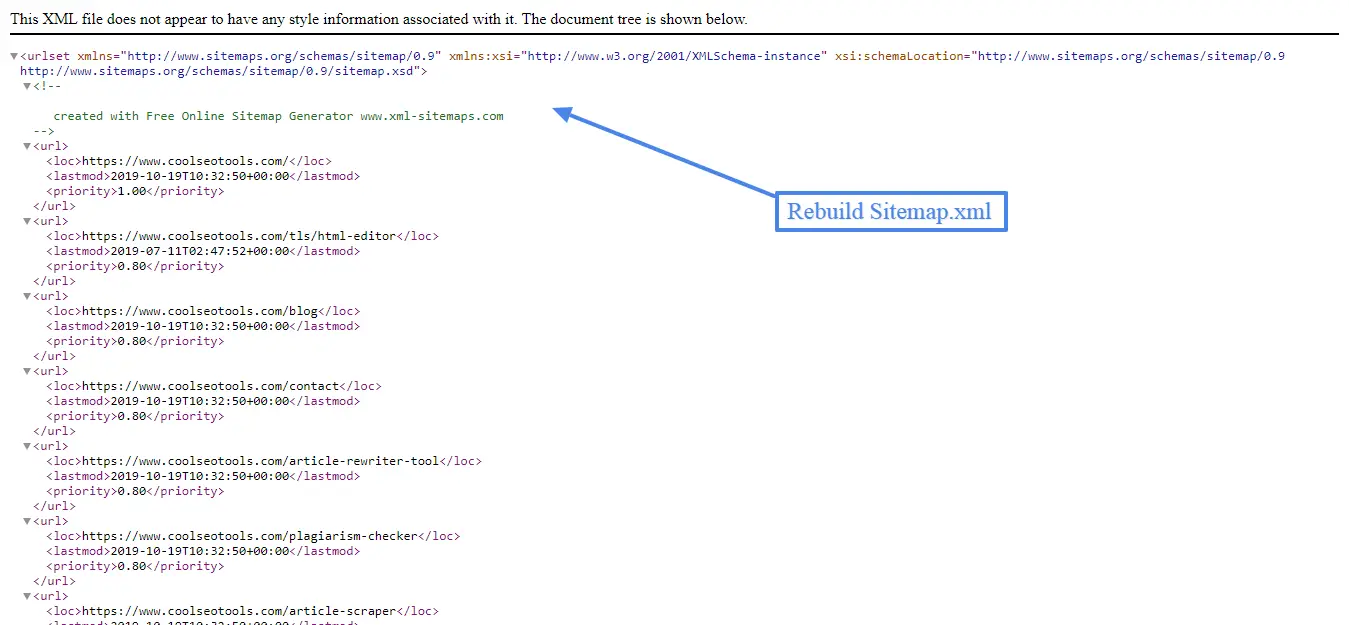
An XML file having a list of all webpages on your website is the sitemap. Additional information as metadata gives details of each URL. A sitemap helps bots crawl and index all webpages on your website. So re-update all the links from http to https where search engine bots can re-index https based URL’s faster.
Some webmaster argues that there’s no need to submit a sitemap to each search engine. Search engines like Google simply look for Robots.txt and find the sitemap location. In this way, Robots.txt helps search engines index your webpages. But you need to keep one thing in mind, robots may take lots of time to identify, crawl, and index all the https pages. So the best option is to re-update XML sitemap whenever any new URLs are created.
Fetch by indexing all URLs, Sitemap and Robots.txt file submission:
Step 1: Find the Sitemap URL:
- Let’s say your website has been developed by a third-party. Check if the third-party has provided your site with a sitemap. The URL of your sitemap (This is by default) is /sitemap.xml. If your website has already been crawled and indexed by Google, you can locate the sitemap through it.
- Use free online tool XML sitemap generator to make your work easy and fast. Just visit the tool, fill the details, and click generate; within a few seconds, your XML sitemap file is generated.
The sitemap tells Google which pages are important and which are not. Include all main webpages in the sitemap, so that google can easily find and index the pages.
Use the URL inspection tool in the Google Search Console to check if the webpage is in the sitemap. If you see “Sitemap: N/A” it means the webpage is not in the sitemap. Simply add the pages to the sitemap.
Step 2: Find Robots.txt File:
Check if your site has a Robots.txt file. If not create one and add to the root directory. Use lower case for file name which contains all robots.txt content. Don’t use Robots.Txt or even Robots.TXT.
Simply open robots.txt at the root directory and if you can’t get the web developer to do it. Place the directive which contains the sitemap location anywhere in the robots.txt file.
If you do not know how to create robots.txt file, checkout our free tool such as Robots Txt generator to create the file.
Resubmit Domain in Google Search Console and Analytics:
Once you have migrated from http to https, all the Urls and domains need to indexed in google search engine. For that, you need Google Search Console, and to track you need Google Analytics. So just update the domain with https version and verify the domain.
Let’s say you have updated a page on your domain or altered some webpages. You want Google to display all this latest content on the search engine result page. Use Google’s fetch tool to get content indexed, get the website listed in the Webmaster account, and ‘URL Inspection’ on any URL related to your website.
If you have updated any pages, add a sitemap to Google. You then select the domain, click on the sitemap, and then type in the relevant URL, followed by submission.

Here are the below 2 steps to submit a URL to the Google index
- You must first inspect the URL using a URL inspection tool.
- You then pick up Request Indexing and a live test is run on the URL to check for indexing issues. Fix any issues found.
Get pages on website indexed by google:
- You must first log on to the google search console.
- Simply navigate to crawl fetch and pick the URL you want to be indexed.
- Paste this URL in the google search bar.
- Make sure to click the Fetch button and after Google finds the URL, make sure to click the submit button.
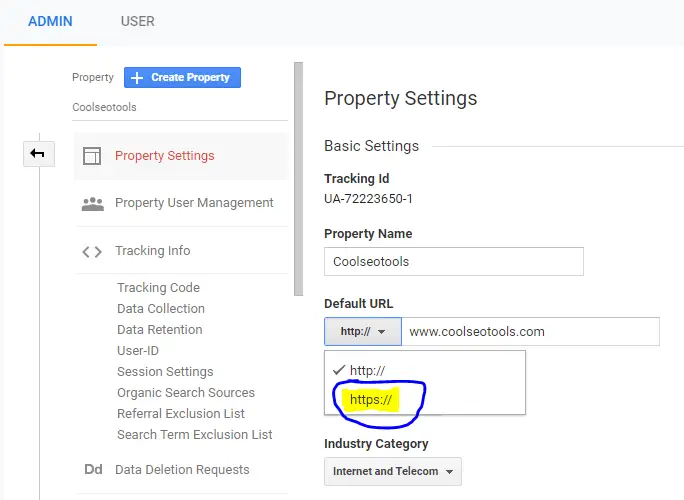
Similarly to reupdate https version in google analytics, first click on admin, select the domain and choose the website property. See the website, change to https version and click save button.
Reupdate all canonical tags:
Make sure to reupdate all canonical tags. Your website pages might not have a canonical tag or it may have a self-referencing canonical tag. The self-referencing canonical tag tells Google this page is preferred and you want it indexed.
If there’s an old canonical tag, google could be led to believe that a preferred version of the page exists while it doesn’t, then your webpages won’t get indexed. Simply use the Google URL inspection tool and you would see an alternate page with canonical tag warning. Just remove the canonical tag if you want the webpages to be indexed.
Disavow old URLs from Google Search Engine:
You can remove unnatural links pointing to your website using Google disavow tool. What is the google disavow tool? Well, with this tool you simply ask Google not to count some of the links which point to your website. Only disavow those links which were created/obtained to manipulate results on google.
Download links from all SEO sources:
Simply download all your links from Google Webmaster Tools. Just go to Search Traffic-Links to your site and download sample links and latest links. You can also download links from ahrefs.com and majestic.com.
Collect spreadsheets from each source and find the column which has a URL of sites linking to you. Copy the whole column into a new spreadsheet using Excel or Google Docs. The result is a large spreadsheet containing all links reported by all tools.
Do an audit and Make a disavow file:
Just visit each URL in the spreadsheet and decide if you want these links from the domain. Separate Disavow links that you don’t need and mark each URL in the spreadsheet as ‘keep’ or ‘disavow’.
After assessing each link, filter the disavow column to see links you have decided to disavow. You then create a new sheet in the spreadsheet, copy domain columns and paste in the new sheet.
Make sure the disavow file is converted to .txt file. Create a new Google Doc and click File---Download As----Plain Text after copying disavow directives.
Submit a disavow file to Google Search Console:
To do this go to the disavow tool and select your website from the dropdown list. Click ‘disavow links’ twice and ‘choose file’ Upload the text file created and wait till the successful sign.
To create a Disavow file use our free Disavow File Generator to create it with less manual work.
How to modify the disavow file?
Do regular checks on backlinks if there are many unnatural links. To update disavow file, go to disavow tool, select your website and then select ‘disallow links’ twice. You then click download then save the file in .txt format, now update with other new links that are harmful to your site.
When does disavow work?
After uploading the disavow file, Google applies to disavow directives to each of your links as it crawls the web. If google were to crawl any page on your domain again, an invisible nofollow tag would be applied to each link which points to your website. You find most links are disavowed in 1-3 months.
On-page and off-page submission for https sites:
Implementing on-page techniques is to make sure webpage ranks on higher on SERP with proper On-page SEO, this by using technical elements and content to improve page quality. The more the on-page SEO, more is the relevant traffic that comes to your website. So optimize URL structure, Headings, Site Speed, Title Tags, Meta Description, responsiveness through on-page SEO, and much more.
Do a 301 Redirection of all old http to https urls, this will helps users and google bots where the old http URL has been. Along with modifying and update all internal links with https for faster indexing.
As we know Google crawls the web and discovers all the webpages, so just submit a website to google, which helps bots to discover all pages faster and index quickly. If you do manual submission, Google may find useful information in your webpages, which may improve website ranking.
You will have to submit a website through Google Search Console after adding the sitemap. Just find the search console, select your property, paste your sitemap URL, and then hit the submit button.
Off-page SEO tells google the authority of site, credible links, and how much people trust your website. If you have many backlinks, google assumes you have great content. Off-page SEO is all activities done to raise page ranking with search engines. This could be directory submission or writing a guest post for another blog or even leaving a comment.
Off-page submission of https sites:
After migrating from http to https, the new https URL's requires backlink to rank higher on the search engine results page. The first most important thing is to create a few necessary directory and classified submissions which helps to backlink faster.
i. Do a Directory Submission
Directories are basically huge databases that gather websites based on categories. Some directories may take an entire website, while most take only webpages.
Paid listing: The owners ask for money for the submission of webpages in the directory. You enjoy assistance when getting backlinks.
Free listing: You don’t pay for directory submission, but it can be time-consuming.
Reciprocal listing: A reciprocal link would have to be submitted to your site to activate the directory link.
How to do directory submission?
- Select the best directory submission site. Pick those with high Domain Authority and Page Authority.
- Select the site where your web pages must be posted and the most suitable category where your blog is the best fit.
- You click on the relevant category and then on the submit link.
- You would see many options to choose from and you pick the relevant subcategory.
- The final step is to choose the directory submission (This is free/paid/reciprocal) and insert the right details of your link.
- After filling details submit the link and confirm through email.
Classified Submission makes the world aware of your business. It brings buyers to brands and services.
ii. Do a classified submission
- You must first search for high PA and DA classified submission sites.
- Register, fill in the details, and sign up.
- You then click on the post ad and choose the category and sub-category.
- Pick free or paid classified listing, add title, description, image, and contact details. Then link for products and services.
- You then click on the submit button, make a verification through Gmail, and the submission process is done.
Build and submit new backlinks:
Write great content: Content is the key to high-quality backlinks in the long term. So write interesting, compelling high-quality content with infographics, and publish it on your website. Also publish few similar contents on other good websites like Medium, Quora, and Authority guest post to generate backlinks.
Generate Backlinks: Do an analysis, study and create content to grab backlinks. Post content that no one has provided, so this makes other website owners to link and give you backlinks.
Make infographics: Readers love infographics along with content. Once you create infographics, other website owners feel interesting on the topic and link to your website. If it helps, they may also share the content on social media platforms.
Comment on websites: This is a great way of getting backlinks. Most websites leave a space for a backlink when you comment on content and share your feedback.
Post guest blogs on the right sites: Write guest blogs only on reputable websites with high domain authority. Write a lot of guest blogs to establish a relationship. This shows you are not in the game, just for the backlinks.
Broken link building: Many well-maintained websites have broken links. These websites would move content around leading to a break in links. If a user clicks on this broken link, it will show a 404 error page, resulting in poor user experience.
Well, you step in by finding the broken links on other websites, identify content where it was originally referred to, then offer the chance to replace the broken link with a valid link. This valid link is of course on your website. This is a win-win situation for all. The site owner has fewer broken links and you get valuable backlinks.
Find competitors backlinks: Find links that link to the competitor’s website, so they may link to your site too. Use sites Moz.com or Ahref.com to extract backlinks of a competitor site.
Step by Step build quality backlinks to your website:
STEP 1: Determine high-value content for the audience. This is basically writing on widely consumed content. Create high-quality content based on the study, do thorough research, and then develop the best shareable content.
STEP 2: Publish and share your content through social media, forums, Q&A sites, youtube, email marketing, push notification, and other media to share your content.
STEP 3: Send email and request for links to replace with a broken link or similar link that matches the content. This is done by approaching sites and making it known, there’s relevant content for them. Make these sites post backlinks to your website.
Conclusion:
There is no denying the benefits of data integrity, encryption, and authentication when switching from HTTP to HTTPS. Sadly, many website owners haven’t made the switch. With proper planning and implementation, switching from http to https only improves security while enhancing SEO. As Google moves to make the web a more secure place, it's just a matter of time before HTTPS becomes an important ranking factor.