How to Submit Your Site to Bing Places? | Get Listed on Bing
Local SEO and business listing is the fastest growing business especially for small business owners who are looking for customers to grow their business. They look for business listing sites that are easy to submit like Google and Bing which have millions of listings and most trusted local listing sites. Because it is easy to access and convenient for users to work with.
In this article, we are focusing on Bing places, which is the second-largest search engine after google. Here we help you with a step-by-step guide on how to submit your site to bing places business listing.
It plays a critical role in converting leads, improving local SEO, and driving traffic to your site with much less effort. Just adding and optimizing Business NAP details to Bing places will maximize your local search presence. You may believe it or not, people who use local search for buying products or services in your locality will have more conversion rates.
How to Submit Your Site to Bing Places?
Before you start, you need a Microsoft account to work with bing places, Just create one account to make the process very simple. To submit your site to bing places, here are the step by step instructions you need to know.
Step 1: Visit Bing Places and login into the account.
First, visit to bingplaces.com, and use any method to sign-in. Bing offers multiple ways to sign-in using Google Account, Facebook account, Microsoft account, or Work account. Just use any one easy way to login otherwise you may have multiple business listings on bing places.
Step 2: Now login to Bing places and select the option to add
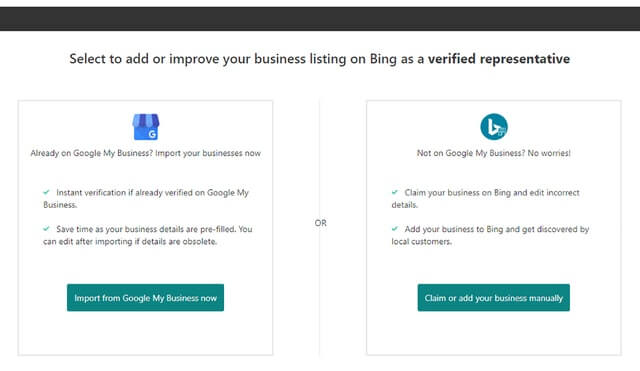
After login, now you have two options to add and verify your bing business listing. Suppose if you have already been listed on bing places, just search your business by typing your phone number, business name, and location. If you found the business already listed then just claim and update the details or follow the instructions to add a bing listing using GMB (Google My Business) or manual method.
If you have already Google my business profile then it is easy to list on Bing places. Just You need to import Google my business profile because it is an instant verification from GMB and saves time without going through any process for bing business listing.
In case if you don't have Google my business profile, then go with the manual process to create a new business profile on Bing places.
Step 3: Add Your Business Details Correctly to Bing Places
If you are creating a new business profile on bing, then enter your business details correctly to be listed. Make sure your business name, phone number, address details, and website are updated properly without any mistakes.
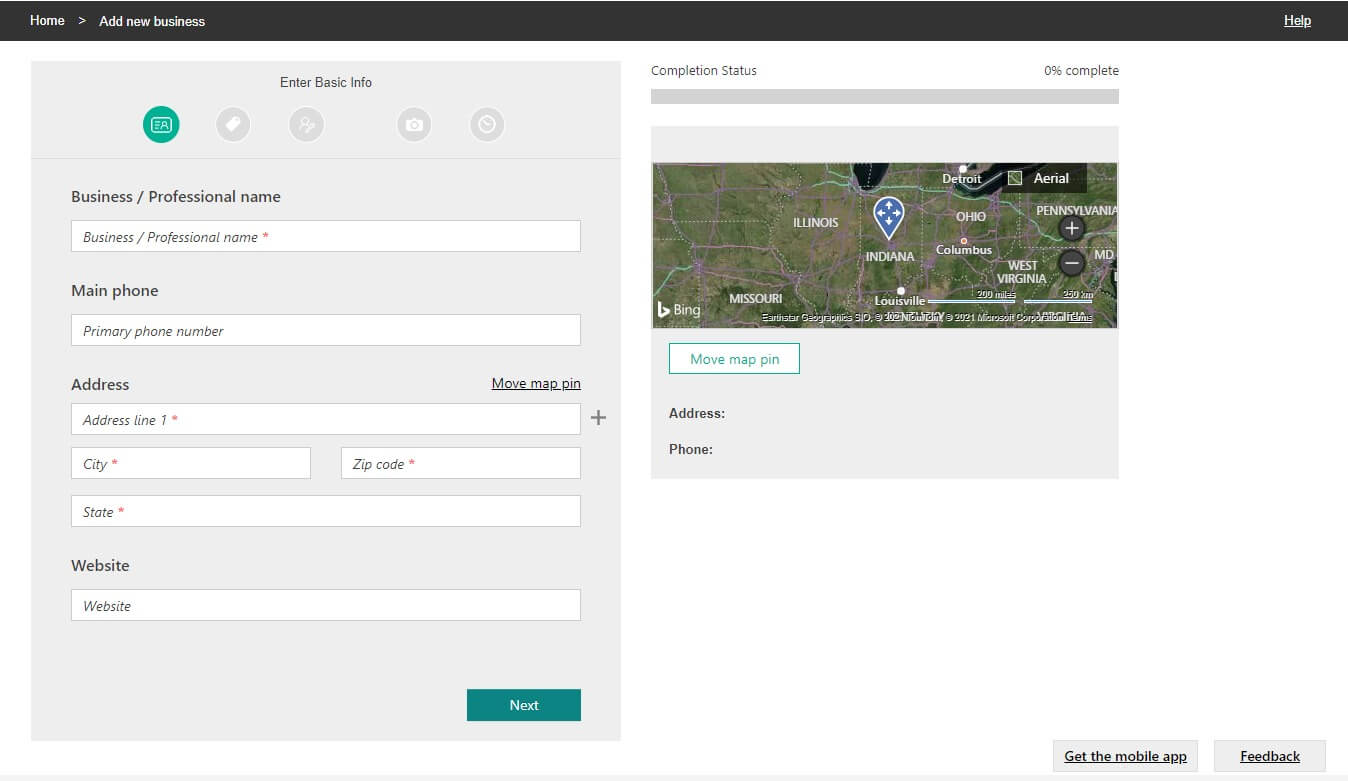
Once you are submitted the above information correctly then next you need to map the pin to your business location perfectly without any error. By mapping the location, it provides directions for customers to visit your place and helps to grow the business.
Incorrect mapping of pin location will drive customers to the wrong place and indirectly affects your business growth. So always double-check your business location is mapped correctly to make customers visit without any confusion.
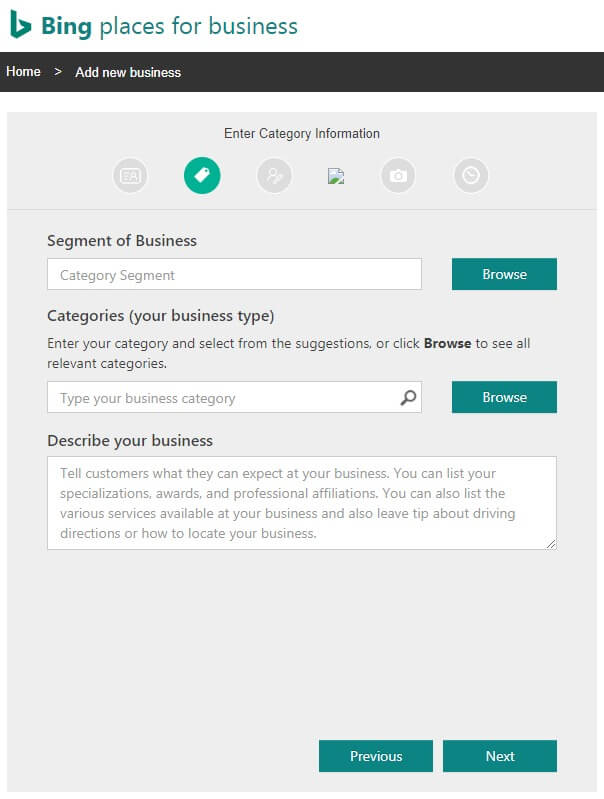
Next, select the right category that suits you and relevant to the search results. This step is very crucial for a business to grow, so Bing understands the type of categories that the business would require and make them appear on Bing search results that are relevant.
Just choose the category and describe your business information in the text box. Once it is finished, visit the next stage.
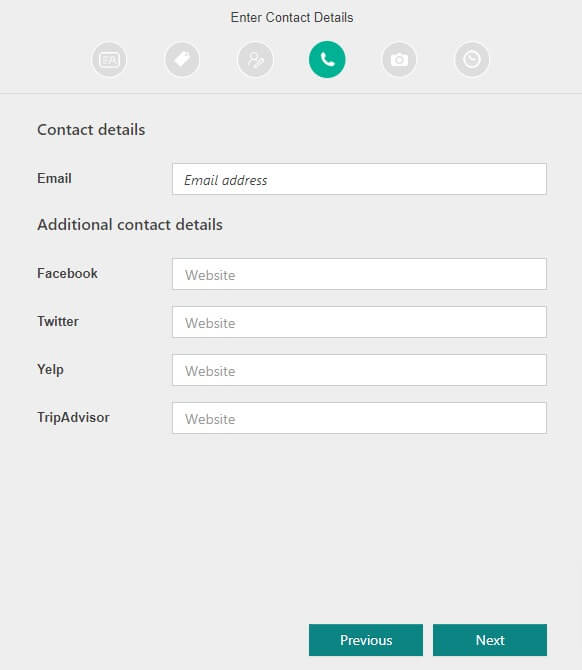
After this you need to add your business email address and additional contact details where people can contact you. After filling in the details, visit the next step.
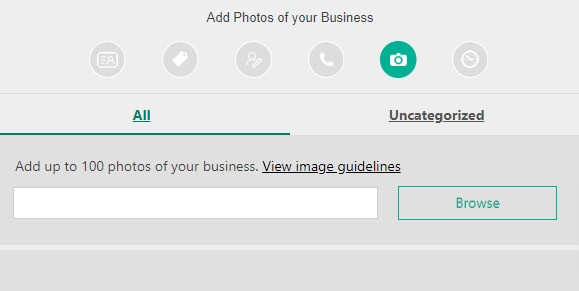
In order to showcase your brand and build trust with customers, you need to upload high quality photos of your business. In this step, you are required to add HD photos of your business to make it visible to the public and build a brand.
The photos could be the CEO of the company, founders, board of directors, business logo, interior and exterior of the business, facilities, employees, service delivered photos, car parking facilities, sample reviews of your business, and finally before & after photos. Make sure all the photos are high quality otherwise listing may be delayed or rejected.
In the next section, you need to add business working hours correctly and make sure these working hours are convenient to businesses and customers. So updating incorrect hours may lead to loss of customers and revenue.
You can add special open and closing timings during business holidays and festival seasons, this way you can increase your business engagement with customers and drive more revenue.
Now with this step, you have completed all your information and finally submitted your business listing to Bing places. Next, you need to verify your business on Bing Places using Phone SMS verification, mail verification, and postcard verification.
Step 4: Bing Verification using Following Methods
The last step to verify your Bing listing is by using the following methods like a business phone call, email, SMS message, or postcard verification. Until your business verification is not completed, bing does not allow to publish the listing. According to your convenience choose the following methods to finish the process.
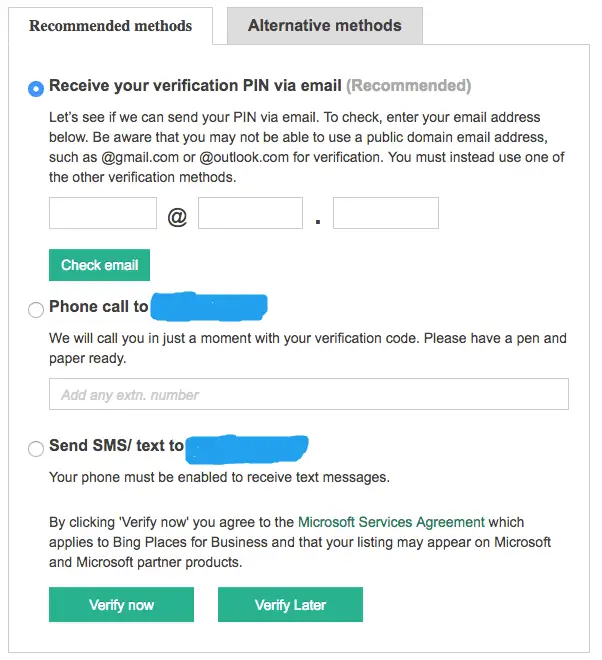
i) Phone Verification method
If you are looking to verify Bing places using the phone call method, bing fetches automatically your business phone number and gives an auto call with a Bing verification code. In case you want to add an extension number, there is an option to fill it before clicking the verify now button.
Once you have clicked the verify now button, you will receive a call from bing places with a verification code. Please listen to the PIN verification code properly and type the PIN in the respective box, then finally click the submit button.
Suppose if you failed to listen to the PIN verification code and were unable to verify, you can choose the 'Call me again' button to do re-verification. If you fail again to verify the PIN code even a second time, then go with the 'Verify Later" button by doing some other time.
ii) SMS Verification Method
If you are unable to verify using the first method (Phone call verification) due to network issues or unable to hear the PIN verification then choose the SMS method. This method is very convenient to use and does not take a lot of time.
Once you have chosen this SMS method, Bing will automatically fetch your phone number and sends an SMS message containing the PIN verification code. Just check your phone messages and type the PIN code shown in the box to verify the bing business listing.
iii) Business Email Verification Method
If you are looking to verify Bing listing using the email verification method, then you need to enter your business email address as shown in the below boxes. Do not use any public domain email address such as gmail.com, yahoo.com, outlook.com, etc. If you do not have any business email address just create one by contacting the hosting provider or by researching online.
Just enter your business email address and check out your email account for a PIN verification code. Once it is received, just enter the pin code on the screen and click verify. Within few minutes your business listing is verified and ready to go live.
Suppose if you did not receive the pin verification code through mail, just recheck your spam folder or start doing it one more time by clicking “Resend Verification PIN” on the screen. This time you may receive the PIN code and verify immediately.
iv) Post Card Verification method
Out of the three methods, postcard PIN verification is the final method to verify your Bing listing. So if you want to verify with a postal card for bing business listing, bing will automatically gather your business address information and send a PIN card to your postal address.
The Bing business listing verification may take up to 3 to 5 business days. Once you receive that PIN verification card to your business address, then go to the bing places dashboard to complete the verification. Enter the postal PIN verification in the textbox as shown, now click on the 'verify now button' to complete the verification process.
Conclusion
After signing the bing places, submitting the details properly, uploading the quality HD images of your business, and completing the verification process may take from less than 15 minutes to 2-5 business days depending upon the PIN verification method.
Once you have completely verified the bing listing using one of the PIN verification method, now the listing is ready to go live within a couple of minutes. Suppose if anyone searches your business services or products on the bing search engine locally, then your listing will appear to the customers and boosts your business sales.